Friday, July 29, 2011

The City Museum, St. Louis

On our drive from Tennessee to Iowa, we decided to break up the trip by doing something fun in St. Louis, about 8 hours into our drive.  Jen found out about this place called the City Museum.
 The City Museum in St. Louis is one of those places that is IMPOSSIBLE to catch on film.  It is a sprawling complex of old buildings and parts of old buildings, industrial scrap, paint, and glue that have been fashioned together into a free for all play space for young and old.
 The slogan they have printed on their t-shirts in "get lost" and to aid us in that endevour, we were told they didn't have a map when we arrived.  We discovered later that tye have one on the website and intend for visitors to find it on their smart phones if needed.. or to just get lost.... which is EASY to do.  This place is full of trap doors and secret passages that don't lead where you would expect.  Often you are sent through total darkness into a chute that then has to be climbed through as it gets more narrow, twists, turns, sends you through a cage, up a ladder and eventually down a slide.  A little scary when you have a toddler or when you are a bit larger in size from having that toddler (and all those cookies!)
This was one of our favorite areas.  Imagine the perfect skate park, only you slide around on your rear end.  This area was big and open, with few secret tunnels so it was easier to supervise the kids.  Our toddler and the tweens who were visiting with us all loved this part.  The grown ups could slide too, but we could also sit and watch.  Between the climbing, sliding, yelling, and the heat.... I was exhausted!

This was the first climbing structure that I was forced to go through.  I thought I was going down a slide and ended up in THIS thing.  I was NOT happy about it!

This place was full of crazy interesting, visually stimulating places to explore. They didn't try to preach to the kids about what scientific properties make this stuff possible.  It was all about exploring and experiencing.  That was cool, until you got stuck in some wire tube twisting up four stories!

The giant ball pit was another favorite.

It was full of kick ball sized soft balls and even adults could dive in!


Lydia loved it and so did I!

More climbing over obstacles, including water features.  At this point I noticed that the ticket strapped to my rist was also a sign of informed consent, stating that I would not hold the museum responsible for any injury or damage.  Nothing was regulated, so injury seemed imminent.  I suppose that was part of the fun and I didn't see anyone get hurt, but it made me nervous.
 It also made for lots of fun and some really tired kids for the last four hours of our drive.  Unfortunately, the drivers were also really tired by that point, but overall, I think it was worth it!
For my OTHER POST on all the visual stimulation, strange textures, and all around funky stuff at the City Museum in St. Louis, CLICK HERE.

Thursday, July 28, 2011

Sexy at Seventy Party!

So now for the REAL reason that I have been obsessing over pink and zebra lately: we had a surprise party this week!  Sue, this really neat, really fun lady at our church turned seventy.  One of the other ladies wanted to surprise her with a party and asked if i could help with the decorations.  I instantly had in idea for the theme:

 I already had several pink and black decorative items, and deciding that Lydia's next party will be "Four and Fabulous" with a similar color pallet meant I felt alright hunting a few more items that can be used at both parties.
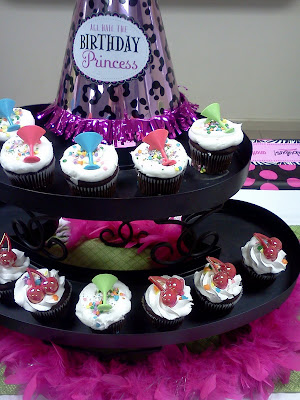
 Walmart had these summery pink margarita glasses on clearance.  They were kind of easy to break, so I am not sure how well they will hold up in storage until Lydia's party, but they were PERFECT for this event!
 I found a modern hat box at the thrift store that was white with pink polka dots.  It opened in the middle, so I just flipped it upside down and placed plates on each half to create two little platform trays.  The party planner lady bought the "Another Year of Fabulous" table cloth at Party City.  I will be saving it for Lydia's party and probably buying a few more items from that line next summer.
 They found a cute picture of Sue as a little girl and we mounted it on a board and let guests sign it.
 Each table had some fabric that fit the theme.  We opened up a zebra striped napkin on top of the fabric and then used some of the broken margarita glasses to hold candy and sparkle filler for a center piece.
This "blessings board" was already on display at the church, so we added another picture of Sue to it.
The food was done pot luck style and it all came together perfectly. Such a fun evening to celebrate a really fun lady!  Happy Birthday Sue!  Stay Sexy!

Saturday, July 23, 2011

Zebra Shoes!

Here is the inspiration.
I had intended to wait and buy a pair of Keds and try making these for Lydia's birthday next year.  Then I remembered these plain boring white shoes in Lydia's closet.  Lydia almost NEVER wears white shoes.  These were bought by mistake and never returned.  They were cheap so I didn't worry too much, but they also were destined to never be worn.  
 Because they were cheap and probably never going to be worn anyways, I didn't worry too much about using them to test out the zebra shoe idea of just drawing on white shoes with a sharpie marker.
Here they are in progress.  These shoes are patten leather-ish so the sharpie went on super easy.  hopefully it won't come off equally easy.  If they are going to look terrible within a short time of putting them on, I want to know that now.
In about 5 minutes I had a perfectly custom pair of little girls zebra shoes.  I bought a beautiful pair of zebra print heels for myself last year and now I can't wait for the perfect occasion for a little mother/daughter shoe styling!

Thursday, July 21, 2011

Lydia's Happy and Sad Game

Lydia invented a game.  It's called "I'll be happy and you be sad". 
 Basically she says.. "I'll be happy and you be sad" and you make a sad face.  She makes a happy face and says something like "Happy, happy, happy" while pointing to her mouth and kind of dancing around.
Next she asks you why you are sad and you are expected to give a reasonable kid reason for being sad, like "I miss daddy when he is at work" or "I have a boo boo".  (I tried scenarios like "Our utility bill is too high" or "I fear a double dip recession" but she wasn't having it!)
Here is my favorite part.  The happy person tries to make the sad person feel better. Lydia will say something like "We can call daddy and ask him to come home for lunch" or "I will kiss your boo boo and get you a band aid."  It is SO sweet and fun to see her figure out how to solve the other person's problem.  PLUS, when it is her turn to be sad, I get an insight into the kind of things that bother her.  It's role playing, empathy, and Lydia thinks it is SO much fun.
I'm not sure exactly how this game developed.  She was playing the other day in the car with some older kid friends and they said she made it up.  I'm not sure how you would teach it to your own toddler, maybe starting with the grown up making a happy face and saying I'm happy and then ask the kid to make a sad face.  If you can get them to play along enough to come up with a reason they might be sad, then I think they would be hooked.  Try it out.  I LOVE the Happy Sad game.

Tuesday, July 19, 2011

Next year Lydia will be Four and Fabulous (right now Pinterest already is fabulous!)

 So, My husband is probably going to be disappointed.  I made a really good case for Lydia's next party being an Ice Cream Parlor them (I scream, you scream FOUR ice cream).  But several things have me thinking next summer should be Four and Fabulous.  I have it stuck in my head that the colors should be hot (or haute) pink, black, and white (and zebra and polka dots and maybe some lime green thrown in for fun)
So the collecting of images and ideas has begun! Only with a new twist because I just got started on Pinterest.  My dad and my sister seem sort of baffled by my need for yet another social media type outlet (with my recent introduction to Google+ I admit feeling a little overwhelmed).  Pinterest is like a virtual bulletin board, only you can have multiple bulletin boards and it doesn't get cluttered if you "pin" a ton of stuff to your "board".  I search the internet like I always do and when I see an image that sparks my imagination, I click this "pin it" button on my tool bar and the picture AND a link to the original website AND my description all get saved to my board.
Then there IS a whole social network element which I haven't quite figured out.  Pinterest instinctually knows who I might know and suggests them to me.  I know that people can "follow" other people, but no one has to accept the other person.  I assume you can also search pinterest, both for people and for boards that are interest you.  Say for example, several moms are planning pink and zebra parties.  I can see what they have on their boards and they can see mine.  If I like something on someone's board, then I can copy it to my board and I retain all the original information so I can also link back to the original website for more info.
Like I said, I am still learning, but this seems SO much better than my old system of saving image files on whatever computer I happened to be on when I saw a neat idea and then never knowing where something originated or which computer I had it saved on.  So.  Back to the images I am finding.  These are all PP (Pre-Pinterest) and I am SO computered out that I am not even going to try to put up links.  If you LOVE this stuff and want to know more, get on Pinterest and find my board for this party and get all the info there. So far we have seen zebra shoes, which I think I can totally copy with a pair of Keds, a Sharpie marker and some pink ribbon.  Next were some invitation inspiration.  I will keep my eyes open for something in the general vicinity of what is pictured above.  Next are some vintage beauty signs.  I want to have a make-up table for everyone to get fabulous and then get their picture taken.  I'm not sure how to work in vintage glam signs, but its an idea.

Now the food.  My theme is mostly color related, so pink food is good.
I think zebra food will be fun.  Most of these ideas are all sweets, so I will have to work on what "real food" we can serve.  Maybe "haute" dogs?  
Finally, one of my favorite ideas is making a zebra cake!  You just work with 2 different colored cake batters and pour them in alternating a 1/4 cup of each right on top of the other.  Not making sense?  Go to Pinterest and find this picture to be taken to the original website with the full tutorial!

Friday, July 15, 2011

Sea Party Invitation

Did I say I was finished with the "three under the sea" birthday party posts?  Oops!  Well, before I start posting my ideas for birthday number 4, I realized I never shared the finished invitations for number 3.
I think I mentioned this image in an early party planning post. Like many of my images, I found it on Graphics Fairy.
I cleaned it up a bit by adjusting the contrast and brightness in photoshop.  As long as I had the editing software open, I played around a little with the sea creatures.  I felt like the sea horse on the bottom right was getting lost so I made him bigger and brighter.  Those 2 ugly guys on the bottom left bothered me, so I replaced them with a purple octopus, image also courtesy of Graphics Fairy.  Finally, I played around with the lettering, trying to make a verse that rhymes and fits well with the graphics.  I think all three birthday invites have had similarly rhyming verse.  You can see previous invites here and here.
So, why is there a square version of the invitation?  Well, I needed to get the invitations sent out before we went onvacation and suddenly I was hit with technical difficulties galore.  My computer was updated and got a newer version of Photoshop, which somehow did not include illustrator, making it impossible to open the invitation that I designed a few months earlier.  Then I tried just adding the words to the blank design, thankfully I had that part saved as a JPEG, but couldn't get the wording to not pixilate without the illustraor program.   I am sure it was all dumb stuff I was doing wrong, but then when my home printer no longer recognized my updated computer, I decided I was just sending out evites this year.  I still really wanted to use my original invitation image, but quickly learned that you have to use an evite template which is not customizable.
Fortunately, evite did have templates that included an area to upload a picture.  So, I just cropped my invitation to be a square and saved it as a JPEG.  I adjusted the writing a little to make it all fit.  I found a template that had colors and a design that coordinated with my theme and went with it.  You can see the finished evite above.  I am not sure if I will continue using evites next year, but it did solve several problems this year and it was neat to have a running tally of who was and was not coming to the party.

Wednesday, July 13, 2011

Little Debbie Mini Cakes!

My sister mention that it would be fun to have a birthday cake made out of Little Debbie Oatmeal Creme Pies. At the time, we were on the Good Shepherd mission trip to South Dakota and eating Little Debbies after every meal.  I forgot how much I liked them!
I have to say, if you like Little Debbie, you will LOVE eating a mini cake made from 3 of them!
The making of the cake was SO simple, just stack and frost.  I was so happy to have a perfectly uniform shape as opposed to some uneven thing that I had to bake!  I thought 3 snack cakes frosted and stacked gave the proportions of a regular sized cake, just on a miniature scale.  Oatmeal Creme Pies come 12 to a box, so my decision resulted in 4 mini cakes.
I LOVED that I could skip right to the decorating and I tried my best to think of it like a "real" cake.  I had a much better result when I did a crumb coating first and then a smooth layer of frosting.
I have learned, both in cakes and in art, smooth surfaces are the most difficult and HAVE to be PERFECT.  If you add a lot of decoration, it actually helps hide your mistakes, so you can be LESS talented if you do a ton of designs and not the other way around.  Also I had some pink frosting left over from the clam cookies at Lydia's birthday party so this seemed like a good excuse to use it up.
I added some sprinkles to the top and a candle to complete the look (and keep the Saran wrap from touching the frosting).  We had a group of 7 enjoy the cakes and still had one left over.  My sister seemed to really like them so I ssuppose next year I will need to concoct something from a Little Debbie Star Crunch!

Tuesday, July 12, 2011

We All Live in a Yellow Submarine!

To wrap up the posts about Lydia's "3 Under the Sea" birthday party, here are a few photos of friends and family having fun at the party. Like last year with the photo booth, I wanted to have a focal point for taking pictures. I saw this idea on another website and basically recreated it to fit my needs.
Lydia has recently been introduced to The Beatles and Yellow Submarine is her FAVORITE song!  It made her so happy to see that she had a yellow submarine to play in at her party.  It made me happy that we had a really big box delivered to work a month or two before her party.  I was even happier when my painted submarine actually fit inside my car so I could drive it home on the last day of school.  Above is a picture of my family posing with the sub.

This also made me extra happy.  PJ's dad came to the party in his SCUBA GEAR!!!!  Someone said.... "Oh, lord.  Here comes Larry!"  I laughed SO hard when I saw him.  I LOVE that the grown ups are willing to be silly at Lydia's birthday parties!  Good Job PopPop!

Here are some of Lydia's favorite friends posing in the sub.

Finally, Lydia shares a moment with her Grammy.  I think that about wraps it up.  Let the planning for next year begin!

If you want to see more about the Under the Sea party click here for the Birthday Dress, here for the streamer wall, here for the activities, and here for the food.

Sunday, July 10, 2011

The Birthday Dress

When I first started planning the "3 Under the Sea" party for Lydia, I decided that we would not be dressing up in mermaid costumes or anything.  I have sewn a special dress for each of her birthdays and they end up being so special to me (1st dress here, second dress here) However, I wasn't sure if I wanted something with mermaids or fish or seahorses or what.  Then I saw this women's tank top shirt at a thrift store and fell in LOVE with the pattern and the colors.  It was a little too small for me to wear so I thought I might turn it into a dress for Lydia.  Then it hit me that it was the right color and the right feel for the start to the birthday dress.
 I found a dress in Lydia's closet that I liked the shape of (the pink thing underneath the dress in progress pictured below) and used it for a pattern.  I was able to use the original arm holes (bonus because they were already trimmed with bias fabric.  This took a little figuring and maneuvering, mostly because I wanted the neckline to accommodate the crocheted trim that was on the original shirt.
 In the end, the dress bodice got a seam in the front (hidden by the trim) and an opening with buttons at the back.  The remaining fabric was trimmed into a tube (the bottom part of the shirt with the side seams still in tact) and gathered to create an high wasted skirt.  The bottom edge of the shirt was originally straight, but it had a wavy design at the bottom edge.  I decided to add some interest by cutting the bottom edge in a matching ripple wave.  I added rick rack, mostly so that I didn't have to turn under a hem on a wavy edge.  I just did a tight zig zag stitch connecting the raw edge of the fabric to the rick rack.
 The dress ended up being a little shear, so I had to add a lining, which meant worrying about where and how the skirt lining ended.  So I avoided the whole issue by making the lining short and attaching a ruffle of a coordinating fabric.  I LOVED that green polka dot fabric.  It was part of Lydia's first birthday dress and it was the lining to her first winter coat.  I used my last decent sized scraps on the trim for this dress and I am kind of sad to see it go!
It ended up being easier to plan the construction of the dress so that the crocheted trim was not structural. That meant I had to do something to stitch it on and that usually means trying to match tread colors so that they are hidden. Rather than agonize over finding the perfect color of thread, I went in the opposite direction and sewed it on with contrasting thread, creating a little more accent in the neckline. I worked the thread into the edges of the trim and every so often I just went all the way through the fabric so the decorative stitches also held the thing in place. I am so very happy with how it turned out and SO thankful that I was down to hand sewing at the point that we lost power for the four days prior to the party.