Friday, January 27, 2012

Art History Valentines!

Today I had a little extra time with my AP Art History students AND we were not able to meet in the ORHS Amphitheater due to ASVAB testing.  So, the art history kids got to venture down to my art room and make stuff.  With Valentines Day approaching I allowed them to make cards that referenced famous works of art.  I showed them a few examples that I have actually made and given away in the past.
A friend who was going through a bad break up got this card based on Artemesia Gentilleschi's Judith Beheading Holophernes.  It remains one of my all time favorite anti-Valentines Day cards!
The photography teacher at my school got this Valentine based on a famous photography by Paul Strand.  My students only had an hour to work on their creations, so several are finishing up at home, but I am SO impressed with the ideas that they were generating, that I wanted to share a few.
One student definitely wanted to use the famous VanGogh Self Portrait after he cut his ear off. She hadn't figured out what to write, but was leaning towards something about giving everything to someone you love.  Above is one of my cheesy ideas.  My other would be to do something with that song by Meatloaf and Celine Dion, I Would Do Anything for Love, But I Won't Do THAT!

This is an image of Coatlicue, the Aztec god/goddess (he/she is both genders) of sacrifice and rebirth.  The statue is covered in snakes and has a necklace of human hearts and hands around the neck. I LOVE the warped and twisted play on words used on this one!  The only unfortunate thing is not many people (especially high school kids) would understand!

I LOVE this play on words too.  She knew she wanted that phrase and then any picture of Baroque art.  I thought her selection of Bernini's Ecstasy of St. Theresa, where the nun is getting stabbed through the heart by cupid (all while having a very sensual reaction to hearing God's voice) was the PERFECT choice!  Happy Valentine's Day to all lovers of art!


Thursday, January 26, 2012

Easter Gender Announcement

I have my 13 week ultrasound next week. (The image below is NOT either of my kiddos, just a cool 13 week image from science photo library)  I will officially be done with the first trimester (which is when I tend to feel sick-ish), I will get to see an image of a real baby instead of the small speck I saw at the 7 week ultra sound (it is AMAZING how much growth happens early on), and I hear from a few friends that they actually found out the gender of their baby at 13 weeks.  
Its a long shot, most of the early gender discoveries are of boys, which are anatomically more obvious, but it has me thinking about how I want to find out and how I want to share that news. One of the things that has been SO different with this pregnancy is the easy access to amazing creative ideas.  When I was pregnant with Lydia, I had internet and some access to google images (it was often blocked at work) but had not yet discovered blogging or the many creative blogs that are a constant source of inspiration for me now.  Now with the advent of Pinterest, I don't even have to read all the blogs, I can just search for Pin-worthy ideas like this gender reveal from Kelly Anderson Photography.
I think that by 20 weeks I will have an idea of what I want to do for a gender reveal, wether that is a clever way to tell family or a clever way for me to find out.  For now I will just share how we revealed Lydia's gender.  First of all, when I was pregnant with Lydia I swore up and down that I wasn't going to find outthe gender.  I made my midwife write it in BIG letters on my chart so there wouldn't be any mix ups.  We told our families that we weren't going to find out.  And then a few weeks before my 20 week ultrasound, I started fantasizing about finding out and orchestrating some kind of a fun reveal.   
I realized that I was leaving town for a week in London immediately after my 20 week appointment and that we would return Easter weekend. Visions of Easter egg gender announcements danced in my head.  Because of our trip, I knew I wouldn't have much time to craft after I found out the gender, so here is what I did.
I bought a pack of those little chenille Easter chicks at a hobby store.  I think they came twelve to a pack and I can't remember if I used them all or what I did with the extras.
I bought some golden plastic Easter eggs. I wanted the idea of Easter grass, but something a little more natural and bird's nest like.  I bought something mossy instead of paper or plastic grass.  I went ahead and assembled my project prior to my doctor's appointment, when I still didn't know what we were having.  I put some thick craft glue in the bottom of the bottom half of the egg.  I shoved in a wad of mossy grass to fill the bottom half of the egg.  I put a little glue on the chick's feet and glued it to the mossy grass. I checked to be sure the top of the egg would still fit and I even think I used the top to help hold the chick in place overnight while the glue set.  At this point I had a unisex chick in a golden egg.  Prior to my ultrasound, I cut out pink banners and blue banners from scrapbook paper.  I went ahead and hand lettered little signs that said "It's a girl" and "It's a boy".  As soon as I got the word that Lydia was a girl, I threw away the boy stuff and glued one pink banner and a few pink flowers to each chick.  I placed each egg in a gift bag and set them aside to casually hand out to family on Easter.  I was even able to put one egg in the mail to my parents in Idaho before we left for London, so that they could join in on the fun!  Here is the only picture that I have of the gender announcement Easter Egg.

Monday, January 23, 2012

We're On TV!

OK, NO, this is NOT the big crafty reality TV announcement.  Sorry I couldn't resist the teaser! After several frantic days filled with emails and calls to alter videos, to delete blog posts (sorry if you have no idea what I am talking about the evidence has been removed), and to adjust You tube settings we seem to be in a holding pattern with no news either way.  In the mean time, I enjoyed dinner and conversation almost every night last week with our fellow parishioners and members of the Family Promise program.  I mentioned spending the night after the sock hop on Friday.  Saturday a new member of a church, who happens to be a former Family Promise guest cooked up a Carribean Feast!

 WBIR came out to showcase the program and specifically how our church is involved. I can't get the video to pop up on this blog because it is on a news site and not on You Tube, but you can click here for a link.  The story focuses on my sister, who helps run the program at our church, one of the most AMAZING ladies that I have met though the program (and I am not just saying that because she fed me a ton of home cooked Caribbean food), and a current member of the program.  If you look closely, you can see Lydia and myself in a few shots.  Enjoy!

Saturday, January 21, 2012

Sock Hop Slumber Party!

Here are a few pictures from the big church sock hop!  You can see how Lydia's saddle shoes and my pink ladies jacket look with the rest of our outfits.
We had a big group of kids and they all had a lot of fun dressing up for the 1950's theme.
There was a hoola hoop contest, several twister games, and a limbo contest.  
The Cool Tones performed a concert in the sanctuary and it didn't take long before everyone was dancing in the aisles!
When we got tired of dancing, my group of Lydia and two little friends headed downstairs to spend the night as overnight hosts for the Family Promise program.  It is a program that operates in several cities and makes arrangements for situational homeless families to spend a week sleeping in bedrooms set up in churches.  It is a WONDERFUL program that gets great results and costs way less then shelters.  We have met some wonderful people through the program and are so grateful to be able to serve our community in this manner.

Friday, January 20, 2012

Pink Lady Project

Can you guess what I am wearing to the church sock hop tonight? 
I found this pink jeans jacket at the Salvation Army for $5 and knew I could turn it into a Pink Lady outfit from the movie Grease!  I thought I was going to need to buy some black fabric paint and that concerned me because I wouldn't get to the store until Friday during lunch and that stuff takes 12-24 hours to dry.
After using the Sharpie on Lydia's saddle shoes, I decided to give it a try on the jacket.  I tested the ink on an inside pocket to make sure it didn't run or smear on the pink fabric.  Once I knew that it would be OK, I wrote Pink Ladies on the back of the jacket in thin plain cursive.
Next, I outlined selective areas to get a thicker, fancier look similar to what I saw in internet reference pictures.  The heart dotting the "i" was all my idea!
Here is the finished back of the jacket.
I decided that I needed a few fun details on the front as well.  Since I am currently "knocked up" I felt it was only appropriate to wear Rizzo's jacket!
I added a smaller Pink Ladies logo on the other side and picked out some cute accessories to complete the look.  I will post some pictures of Lydia and I in our matching fifties inspired outfits after we attend the sock hop. Hoppy  Friday!

Thursday, January 19, 2012

Sharpie Saddle Shoes!

We have a sock hop at our church tomorrow. I have been fighting a nasty cold for a week so I haven't had any energy to think about fun fifties outfits. Today I felt too crummy to focus on grading or planning during my lunch period so I made a quick trip to the Salvation Army near my school to see if anything spoke to me.
 I found these white leather lace up Keds in Lydia's size for $3 and decided that they would make excellent saddle shoes. I used a Sharpie marker, similar to how I made Lydia's zebra shoes over the summer.
 I found a picture online to help get the shape right, but mostly I just followed the stitching.
 I used a white paint pen to add some dot details on the edges like I saw on several of the saddle shoe examples.
 I literally spent TEN MINUTES per shoe.  When I finished with one show, I lined it up next to the other shoe and used it to plan a matching design.
I am SO happy with the results!
I had big plans to make a poodle skirt to go with these, but when I got home I remembered a pink and black crinoline tutu skirt that looks perfectly fifties.  
With the time that I saved NOT making a skirt, I was able to use the Sharpie to make a little something for myself.  More on that project soon!

Thursday, January 12, 2012

Making More Matching Outfits

I was at the mall over Christmas break and Gymboree and it's sister store Crazy Eights were both having big sales.  I found this cute "I love mommy" shirt for just $3!  I saw that they had a coordinating plaid skirt, but not in Lydia's size.  I thought about just getting the shirt, but I really liked all the colors together.  Since I couldn't get the right size, I got the biggest of the wrong sizes as I could find.  I left the store with a toddler sized shirt and a size TWELVE (Lydia is only 3) skirt and big plans for all the extra fabric.
 Here is the skirt before I did anything to it.  It had a flat front, a side zipper, and an adjustable elastic waist in the back (the kind with a button on each side and the holes in the elastic.  I have written before about how easy it is to make a skirt smaller by just gathering the elastic, but this skirt was REALLY big and also a little too long.  Besides, I had a few ideas for any extra fabric that I could salvage from the skirt.
 For starters, I cut off the waist band.  I wanted to reuse it, because it already had the adjustable elastic part.  I decided to just move the waist band down to where the first ruffle began.  So I cut off about an inch and a half wide strip between the waist band and the ruffle.  We will come back to that fabric later.

 Here is the skirt laid out the way that I planned on sewing the new waistband.  You will notice that the skirt was a bit wider further down, but it was also way too wide for a toddler AND it had that zipper that was no longer needed.  So, I cut the side seam (and cut out the zipper) and sewed it a little less wide so that everything lined up.
I laid the old waist band in the new position and sewed it to the top of the ruffle.  I tucked the raw (cut) edge under as I went and just sewed on top of the line of the original stitching which had not been removed.
Finally, I gathered the adjustable part of the elastic as much as I could and Lydia's outfit was complete.  Her skirt is REALLY full in the back (maybe too full?) but it is a ruffly skirt so who cares.  Besides, the shirt is big enough that she should still be able to wear the outfit next year and the skirt will get less full as it gets adjusted.
OK, so here is all that was left after altering the size 12 down to about a size 5 with elastic pulling it in to fit a size 3.  Not as much extra fabric as I thought I would have!  I only ended up with the extra inch and a half from below the waist band, and the shorts that were lining the skirt.  I decided the shorts  would be too awkward under the smaller skirt so I cut them out.  The skirt was thick so I doubt it will be a problem that it doesn't have a lining. 
So, here is what I did to create a matching skirt for Lydia's American Girl doll.  I cut about a six inch wide section from the top of the shorts/lining.  I sewed a hem on the bottom. On the top edge, I folded over and sewed a really wide section, about an inch, to house the elastic.  The doll skirt is still a rectangle of fabric at this point, so the area that will need the elastic is still open on both ends.  When I was completely finished with the skirt, I threaded elastic through this space (pin a safety pin to one end of the elastic and feed the safety pin through from one side to the other.) and pulled it tight enough to fit the doll's waist.  Then I just sewed a side seam to make the skirt a loop instead of a rectangle and to close off the elastic area.
Because I wanted ruffles on this skirt, and because the skirt was so small, I sewed the ruffles to the skirt while it was still a flat rectangle.  I gathered the one strip of plaid fabric and sewed it to the bottom of the skirt.
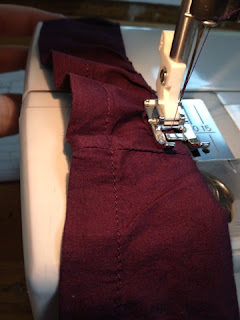
I learned this trick from a blog that I read (tutorial here) about gathering ruffles using just your machine tension settings to do the work.  I set my tension really tight and as I feed the fabric in, it gathers and ruffles on its own!
Here you might be able to see the effect on the purple ruffle.  I had to put a purple ruffle on top because I was out of the plaid, but I still wanted the shape of the skirts to match. Lydia's skirt has two ruffles, so the doll's skirt does too!
Here is the finished product on Lydia and her Nellie doll!

Funny Fortune Cookies

I am sick this week, with a sore throat, runny nose, and fatigue on top of my standard first trimester fatigue.  I have several posts started, but just can't seem to focus much energy on finishing anything.
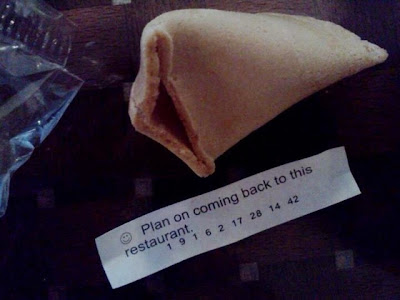
PJ and I frequent a little Chinese place near our house and we have gotten some of the strangest fortune cookies at teh end of our meal.  Strange enough that I took pictures of them.
The first two were PJ's cookies. But this next one is ALL MINE!

Monday, January 9, 2012

In Honor of a Friend

A sign at the Knoxville Marathon support station hosted by my sister and myself.
I have a friend who did something very brave a few weeks ago.  This friend has spent a lifetime fighting some  pretty nasty inner demons.  This fight has taken her down some dark and lonely paths and come very close to getting the best of her on more than one occasion.  Her friends could only guess at the battle raging beneath the surface.  We could not fight the fight for her.  We could offer moral support, a laugh, a beer, potato chips, Motrin, and actual and metaphorical band-aids.  But she had to make the decision to keep going when that alone was a brave choice.  Incredibly, when traditional forms medication or meditation failed she researched and found new techniques and experimental programs to try.

And so, a few weeks ago, my friend left her job, her home, her pets, and her loved ones behind to attempt an experimental procedure that had a 50/50 shot of working.  Her friends sent messages and cards, made short trips to visit, but we couldn't battle the inevitable loneliness and boredom and we certainly couldn't do anything about those nasty inner demons.  Today she completes a six week experiment that she thinks may have changed her life.  She is optimistic and she is happy.  As someone who has watched her struggle for decades, I am so excited at the possibility that she has found success, but I am not surprised.  I have been one of her cheerleaders, but she has always been the one with the power (and the courage) to keep fighting.  I am in AWE of her determination and so excited for the future!

Friday, January 6, 2012

Merry Christmas to ME!

While I didn't get around to making as many Christmas gifts as usual this year, I am SO excited about the gift that my husband made for ME!  We were at a Target store a few months before Christmas and PJ was already asking what I wanted, when I spotted this bike and my head was filled with images of riding in parks and having picnics. 
 I told him that I really liked that bike and even thought it matched our station wagon nicely.  I probably said that I wanted a basket on the handle bars or something, but pretty much there it was, shopping done.  PJ responded by pointing out that he had tons of old bikes at his shop and he could make me a bike.  I'm pretty sure I tried to sway him towards the nice shiny, non rusted, non rotted, non infested bike right there at Target. He responded by showing me the bikes at his shop, which probably led me to reiterate how nice the Target bike looked.
Thankfully, PJ knew better and he got his hands on the white and blue bike on the right of the picture.  The bike was purchased by his grandfather's sister long long ago.  I think it ended up at the shop when she was cleaning out he house to sell it a few years ago.  He cleaned and fixed and re-painted and re-chromed every inch of the bike.
The bike is now a beautiful two toned green with champagne accents and red pin striping to match the red handle bars and the red Western Flyer decal.
 He added a beautiful leather seat,a nice big wicker basket, and beautiful white wall tires.  He added a few "PJ custom effects", like the B from his company logo (B-rod or Custom).
 It is so much better than anything you could buy from a store.  It is one of a kind.  It was made with love and I am in awe that it is mine!