Showing posts sorted by relevance for query shirt. Sort by date Show all posts

Tuesday, April 24, 2012

An Upcycled Outfit

So today was one of those days where getting anything done, especially an hour or so of craft time to sew for Elsie Marley's Kids Clothing Week Challenge, just seemed impossible.  I was up most of the night with a fitful coughing child.  I awoke to realize that PJ wasn't much better an would be little help in caring for Lydia while she stayed home from school.  So I called in for a substitute, hoped my students could manage one more day without me, and set to work getting everyone doctor's appointments, medicines, and naps.  By 8pm, all my patients were in bed and I decided I could spend one hour at least prepping some projects for sewing later this week.
I had two more t-shirts that I wanted to turn into infant night gowns. This orange "give a hoot" shirt and a brown shirt with Kermit the Frog on the front.
I still have the Mickey Mouse shirt cut out but un-sewn, so I used that as a pattern.
I couldn't believe how fast it was to cut them out when I wasn't also figuring out the pattern!  Kermit is right, it is easy being green!  I need to get some trim for these shirt/gowns to be completely finished, so I set them aside and realized that I still had about 50 minutes left in the hour I committed to sew on kid's clothing.  Fortunately, I had a stack of outfits that I bought at the thrift store for baby Joshua that each needed a little something done to them.
I decided to start with this super boring camouflage outfit.  I bought the pants for 89 cents and thought they might be an interesting neutral with just the right shirt.  That boring grey shirt is NOT just right, but it matched the grey in the camo and did not match anything else in Joshua's wardrobe.  I wanted to add some color and interest to the shirt.  The pants have a little orange stitching in the pockets, so I thought using the orange scraps from the "give a hoot" shirt/gown to make an applique on the front of the shirt might be a good idea.  It took a few minutes to choose a simple but effective design.  See if you can figure out what I am making.
 I started by making an orange square.  I folded the fabric in quarters to make it easier to handle and more likely to be symmetrical.  I started with what would become a 6x6 square, but that ended up being too big for the shirt so it was worked down to 5x5.
I don't have too many problems turning a square into a circle, but if you do I am sure you could get a pattern or a protractor or something.
Because my design is symmetrical, I opened the circle up to where it was only folded in the middle and drew on the back of the fabric to plan where I wanted to cut. You can probably tell by now what I am making, a peace sign!  I thought it would be a fun an ironic twist to all that camouflage!
When I opened up my design and tested the placement on the shirt, I discovered a minor problem.  I did not like that seam at the top of the chest being visible cutting behind the peace sign.  It's a little thing, but it would have bugged me and it is the kind of detail that you wouldn't see in really well made clothing.
This is one of those WONDERFUL instances when the solution to one small problem actually helps out with several other issues down the line.  I realized that the scraps from that Mickey Mouse shirt/gown were a coordinating color, so I cut a circle to place behind the peace sign.  The issue with the visible seam was SOLVED, but now there was a second color added to the design AND the peace sign was even more contrasting to the dark grey shirt!
But wait, there's more!  Sewing all of the peace sign edges to that tiny baby shirt would have been difficult.  Now I could sew the orange peace sign to the off white background circle without the shirt being in the way. 
 I originally made the background circle extra big so that even if it moved a little everything was covered.  Once the middle was sewn down, I cut the circle as small as possible so that there was no way it would peak out from the edge of the peace sign.
 Then I pinned it in place (I rarely use pins, but it was such a small shirt and the peace sign really needed to stay put) and I sewed the outer circle of the peace sign to the shirt.
The finished shirt looked good, but I wanted to bring a little more orange into the pants.
  I had these little strips from the bottom edge of the orange shirt and they were just as long as the pockets were wide.  (Don't see the pockets on the pants?  Well that's the problem with camouflage!)  The orange edge at the very bottom of the pants is a really small detail, but it really ties everything together... and now you can actually SEE the pockets!
Thank you Elsie Marley and the Kid's Clothing Week Challenge for giving me the push to sew for at least one hour (I swear, that is all I spent on everything in this post!) on  a night when I could have easily not down anything at all.  I am so energized from the time that I devoted to this project and SO excited about the outcome!

Wednesday, April 25, 2012

$2 and 2 Hours (so far)

I have been hunting interesting t-shirts at thrift stores with plans to make unique boy's clothing.  I actually made some infant gowns out of adult t-shirts before the big gender reveal.  I have also used the scraps from those t-shirts to applique baby outfits.  This project bounces back to using the whole t-shirt, and WHAT a t-shirt I found!!!!
If you saw our Christmas Card, then you got a glimpse of our Chevy Impala station wagon, or "daddy wagon" as we refer to it.  When I found this shirt at my local AmVet's where all the children's clothing is 89 cents a piece, I got SO excited.   I LOVED the vintage feel of the color and the logo.  AND it is super soft, which can be less likely in the thrifted shirt category, but is SO necessary for baby stuff.  This shirt, was a smaller adult or teen, so priced at a very reasonably $2, instead of my usual 89 cents, but who cares!  
I loved this one so much that I didn't want to make a night gown that no one would see.  I also wanted to avoid anything newborn size because I wanted it to be worn for a while.  I had looked at some tutorials on line for making shortalls from old t-shirts.  This link includes an actual pattern that you can download.  I am not really a follow a pattern kind of gal AND I kind of wanted pants instead of shorts, so I created a pattern using an existing baby romper.  First, I laid the one piece outfit on top of the t-shirt and checked for placement of the Chevy logo.  
Next, I started cutting out the basic shape.  I was leaving a little extra room for the seam allowance (the extra fabric that will go into the seam) and noticed that the bottom hem of the shirt was only a little longer than the legs on the outfit.  I didn't want my pants gathered at the bottom, so I just decided to roughly use this distance as the amount of room to leave for the seam allowance everywhere.  The original outfit was a 3-6 month size, so I hope the upcycled outfit will be more like 6-9 months in size and length. At the top, I carefully cut free the neckband and used that as the edge of the new neck.  I did NOT cut above the shoulders, I just left the original shirt in tack all the way up to the shoulder seam, because this design has those shoulders that overlap to allow a head to go through without needing to button in the back.
Here is a close up of the neckline.  On the right is the shoulder as originally cut at just the t-shirt shoulder seam.  On the left is where I have trimmed the shoulder to match the overlap on the baby outfit.  Once you have one of these figured out, it is the same shape for the other side and also for the front and back.  It is also the same neckline shape that I have been using for the baby gowns from upcycled t-shirts
Moving down to the crotch, notice that the front and the back are different here, to accommodate for a bulky diaper butt. I only wanted the front shape for now, so I tucked under the back side to get the right shape.  Just make sure you are cutting the front and back separately if you try something similar.
I also folded my t-shirt fabric in half, so that I could cut once and have both of the front halves be symmetrical.
At this point the main front piece, with the logo was finished.  I used it as a pattern for the back piece up until I cut the crotch.  I had to use the back of the baby outfit to get that shape correct. (sorry no pictures) Also, the crotch had one extra piece to also help with the extra room needed for a bulky diaper.  Don't miss that detail if you are doing something similar.
For the trim at the neckline, I discovered that the off white of the Mickey Mouse shirt that I turned into a night gown was a good contrast.  (I also used some scraps from the MM shirt in the peace sign applique the other day!) I cut it in half at the fold to accommodate the front and the back piece.  This took the place of the sock that I used on the blue night gown and i liked the way it sewed much better.
Here the trim has been sewn to the right side of the front and it just needs to be turned to the inside and edge stitched.
Because the Chevy shirt was smaller in size, the sleeves wouldn't have been long enough.  So I uses the extra from that Mickey Mouse shirt (it was really HUGE) to make a full length sleeve and then overlapped it with a shorter dark grey sleeve.
This picture shows everything during the assembly process, so it is inside out.  I lined up and overlapped the shoulders first.  Then I sewed the sleeves to the shoulder.  Finally  i sewed all the way from the end of the sleeve, into the arm pit, and then down the side seam to the bottom of the pants.  It is SO similar to what I did on the gowns.  The only difference is that I have to deal with that crotch and that requires SNAPS, which I am hoping to buy tonight and spend my hour completing this outfit.  However, Lydia is home sick AGAIN (I am VERY thankful for my sister taking a turn with her so that I didn't need a 5th day off from work in a row!) and I have one work commitment this evening.  So I am cheating a little with 3rd post for Elsie Marley's Kid's Clothing Week Challenge.  I am posting this (almost finished) view of the Chevy romper with my promise to spend an hour shopping for, buying and figuring out how to install those crazy diaper changing snaps in baby clothing.  Honestly, it won't look any different with the snaps, so enjoy a glimpse of the (mostly) finished outfit!

Tuesday, October 4, 2011

A Wonderful Halloween Costume

While I was at work on Monday, I got a text from a friend about scheduling a sleep over with Lydia and as an aside, she asked if I could keep my eyes open for something that her daughter could wear to be Alice in Wonderland for Halloween.  I decided to stop at my favorite thrift store (the AmVets near my house) to start watching for either a blue dress or a blue shirt and skirt and a white apron.
For 89 cents I picked up this Rare Editions blue smocked cotton dress. (I can sell the dress alone at consignment for ten times what I paid if things don't work out, so no worries here!  The dress is sleeveless and Alice has sleeves, so....
for 89 cents I also got this blue short sleeved t-shirt.  Next I needed something for the apron.  I found a white ruffled curtain valance, but they wanted $3 for it.  Instead....
for 89 cents I got a white cotton tunic shirt with pretty lace details.  First, I put the t-shirt under the dress.  No sewing required and it will add a little more warmth for a TN October night.
At that point the dress was finished, and still unaltered so it can always be taken apart used as just a regular dress later.  The only part that required work was making the apron.  Here is what I did.
I cut the sleeves off an then cut the bottom half of the tunic free from the top of the shirt.  My idea all along was to use the sleeves as the waist band/ties and the bottom half of the shirt would get cut open and gathered.
I laid it out and decided that it needed a top part to the apron to really look like the classic illustrations of Alice.  The problem was I only had a few scraps of fabric left, not enough for a full front of an apron.
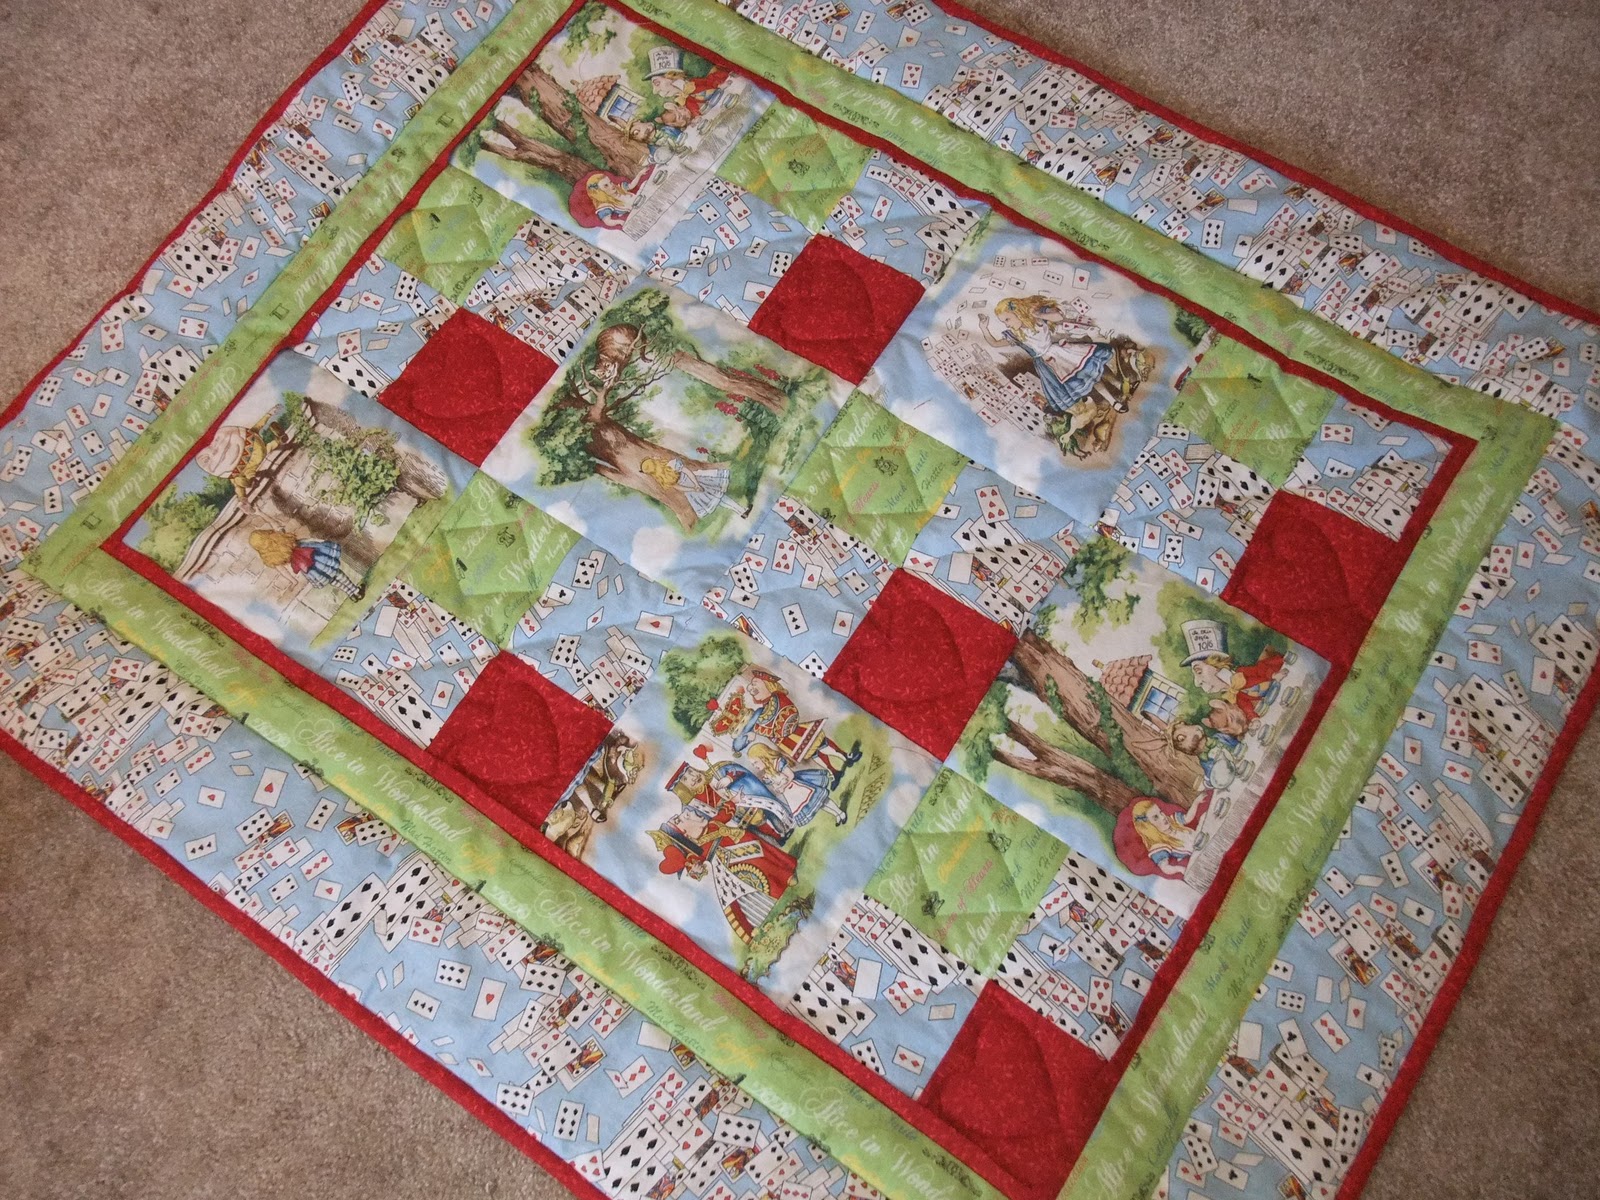
That is when I remembered the Alice themed quilt that my mom made for Lydia's Alice in Wonterland, Tea for 2, second birthday party.  She was kind enough to give me all the scraps.
I played around with a few options and decided that the tea party scene fit the front of the apron the best. Then I just had to figure out how to work around the scraps of white shirt that I had left.
I decided to cut the bodice of the white shirt into four sections.  I used the two side pieces so that the lace made a border around the Alice image.  The picture below doesn't show it yet, but the other two pieces of lace, the small ones from the middle of the shirt were each half as long as the center of the apron. (Boy did I get lucky on that!) So I sewed the lace together and used it to frame the top of the Alice image.
The sleeves were cut apart and sewn end to end to make a nice long waist band.
It took a little finishing work, but all total this costume cost less than $3 and right at 2 hours of my time!
It needs a good ironing,  but my friend should be up to that!  Who knows, maybe in a few years, Lydia will wear this costume and I can be the red queen! Hmmm, I might have to keep my eye open at the thrift store for something red.

Monday, May 28, 2012

A Fabulous Shirt!

Every year, so far, for Lydia's birthday I have made an outfit to coordinate with her party theme. There was a 1 year old butterfly dress, a two year old tea party dress, and a sea inspired dress last year. This year I needed to come up with something "fabulous"!
I saw this shirt on Zulily.com and thought that it had the right feel. Unfortunately, it was a close out sale and only available in size 12. I got the idea to try and make a similar shirt, but with our pink and black color scheme. As long as I was changing things, I figured I could try to make the girl look more like Lydia.
I had some thrift store clothing that I was going to play around with to make an outfit. Then I saw this pink and black fabric with scenes from Paris and I just had to have it for the birthday outfit.
Looking at both the inspiration shirt and the Paris scenes on the fabric, I sketched a few ideas.
When I slid the drawing inside the shirt, I could see through the fabric so I only had to trace the image.
I used a fabric marker, which took a bit of work to get it all uniformly thick and even. Fortunately, Lydia didn't mind spending some time in the studio while I worked on it.
Once the drawing was finished, I added a few appliqué pieces. This was my first time using anything like "heat n bond" prior to sewing and I really liked the results. The "heat n bond" was thin enough that I could just trace the shape and then cut the fabric to fit the right shape.
And here is the finished, FABULOUS, shirt. All I need now is to get a few ideas for a matching skirt and the outfit will be finished.

Wednesday, January 16, 2013

When Skies Are Grey....T-shirt Turned Dress

The inspiration for this dress was actually a pillow. I was thinking of doing something similar and thought an old t-shirt would make an easy pillow form that could be written on with a bleach pen.

I found this super soft long sleeved grey shirt at a thrift store.

Somewhere between buying the shirt and starting the pillow, I saw this red and white outfit in a catalog and decided that the grey shirt really wanted to become a dress for my daughter.

I found one of her knit dresses and used it as a pattern.

Originally, I was just going to do a sleeveless tunic, but the skirt on the dress that I used to make the pattern was fuller than the t-shirt. So I decided to use the sleeves to add to the skirt volume.

I just turned the sleeves upside down so the widest part was at the bottom. When I cut then straight at the bottom hem, the little bit of extra fabric was the perfect shape to make a little sleeve.

A few seams and a gathered waist later, and here is the finished dress shape.

Now for the FUN part!

I decided to write lyrics from You Are My Sunshine because I love it AND because of the whole "when skies are grey" part seemed to fit well with the grey dress. I also got an idea to work a bright sun into the design somewhere.

Here's the front if the dress in process. When I saw pink on the edges, I decided it had probably done all that it was going to do.

And here is the front of the dress after I washed off all the bleach. I never guessed it would turn pinkish red!

I added more lyrics to the bottom of the dress but need to decide where else I want to add them. I also still intend to add a sun somewhere, but now I might rethink the colors I'll use. It may be awhile before I have time to play around with it again. I'll keep ya posted!