Saturday, July 9, 2011

Super Simple Streamer Wall Decoration

For the "3 Under the Sea Party" I wanted something to create BIG impact behind the main buffet table.  Last year I  hung a bunch of items (paper lanterns, butterflies, letters) from the drop paneled ceiling at our church parish hall and each item required a separate trip up and down the ladder to hang it and then up and down again to clean up.  This year, between the power being out for 4 days prior to the party and my leaving for a mission trip 12 hours after the party, I needed something simple to make, simple to hang, and simple to take down.... but it still needed to look SUPER.
 My solution was a wall covered with streamers.  I liked that for the "under the sea" theme, this decoration functions like a giant water fall.  However, change the colors and it could work at any party.  It didn't cost much (I bought 2 colors of streamers and a roll of masking tape) and did not require much skill (I was sleep deprived and hadn't had power in 4 days when I made mine!)
First, I rolled out about a 3 foot length of masking take, sticky side UP, and did NOT tear the tape from the roll.  I did my set up on the floor, right in front of the buffet table so I knew exactly how long my streamers needed to be. I attached one end of one streamer to the sticky side of the tape and then measured that streamer to my desired length, cut the streamer (I just tore it because the ends were going to be behind the table), and then attached the end of the next length of streamer next to the first. I kept adding streamers and unrolling more tape as I went along.
 Here is the technique I perfected to save time and keep it simple.  I placed the streamer in the right spot on the tape with my hand.  I was alternating colors so I would do a few dark streamers spread out and then fill in with the lighter streamers. (If it was all one color I would have just gone in a row)  Once I placed it on the tape, I used my big toe to hold it down (the tape was just sitting sticky side up, so pulling on the streamer also pulled the tape off the ground).  I took off my shoes to have a better feel for what I was doing.  My foot was on top of the previous streamer, but that kept the tape from sticking to my foot.  Then I pulled the roll of streamers up over my head.  I figured I needed about 6 feet in length so once my arm was up over my head I just tore the streamer and repeated for the next one in line.  If I needed longer streamers, I would have had to clear a big area and measure the streamers out on the floor.  This way, I just let them drop into a pile once they were measured and cut.
 Once my streamers were long enough (I went about 2 feet longer than my table) I doubled the tape back over the top of the streamers.  So the final pattern went tape (sticky side up), then the streamers, then tape sticky side down (stuck to the streamers) like a streamer sandwich.  I never even cut the tape, just looped it over.  I wanted the tape double thick to make it stronger for hanging.
The fellowship hall where we had the party has a drop tile ceiling, so I just used paper clips to hold up the banner in about 5 places.  It did take 2 people to lift the banner and walk it around the table to hang it.  It only took one taller person to pull out the paper clips at at the end of the night. Super Simple Streamers, super easy clean up, super big impact.

Want to see more ideas for cheap tissue paper decorations? click here

Thursday, July 7, 2011

Under the Sea Activities

 Because Lyda's birthday parties always have guests of varying ages, often more adults than kids, I like to have a wide selection of activities available.  Last year we had more structured group activities, and I think I preferred the looser open house style of a party that had this year and for Lydia's butterfly themed first birthday. I like to have lots of activities available that kids, of all ages, can pick up and put down at their leisure.  This year, I set up an activities table full of sea themed loot.
Here is the long shot of the activity tables.  I didn't put chairs at these tables to encourage people to take items back to their tables, so this area acted more like a crafty buffet.

 I found this little treasure box at a thrift store.  I filled it with plastic necklaces, pirate eye patches, miniature telescopes, sea themed silly bands, and under the sea tattoos.  We also had temporary tattoos at Lydia's first birthday party and I was surprised that the adults seemed to have as much fun with them as the kids did.  This year I was happy to see that party guests of all ages continued to enjoy the tattoos.  I cut most of the tattoos apart (they came on several large sheets) prior to the party and then set out a sponge to activate the tattoos, making it a self serve tattoo party parlor.
These Sea Urchins started out as a decorative idea (see post here).  After my initial $2 score at Walgreens, I found more on the $1 aisle at Target and bought all that fit my color scheme.  These were a BIG hit, some of them lit up and most of the kids got theirs early so they played with them during the part.  Fortunately, we ended up having the PERFECT number (awesome considering it was an open house with kids trickling in and out).

 I had three crafty activities.  They were all related, so they had some overlap in materials.  The first was "build a sand castle" using sand paper shapes.  I bought one pack of sandpaper from the hardware aisle at Walmart and cut them into various rectangles and triangles.  The sandpaper was not sticky backed so I layed out some glue sticks.  I also cut some blue paper to be backgrounds.  I also tossed out some foam sea themed sticky shapes to complete the under water images.
This ended up being really similar and a little redundant, so I could have probably saved myself some time on the sandcastles. Honestly I bought these sticker scenes from Oriental Trading first and then I fell in love with the sandcastle scenes, so i had them both.  For the younger kids, an less crafty adults, these were easier. 
An added bonus to the sea scenes from Oriental Trading was that we had extra fish stickers.  They could also be used in the sand castle scenes, or just stuck to kids arms, legs, etc.  Or, the stickers could be used to create a "decorate an aquarium activity".  I purchased these water filled glitter globes from Oriental Trading.  I bought them as a party favor, intending to replace the coloring page insert with a picture of Lydia so that she would literally be "under the sea".  We had extras so I scattered a few on the activity table with blue paper that was pre-cut to fit the globe.  Kids could easily put stickers on the paper or write and draw on it and then insert it into the water filled glitter globe.  The kids really liked that everything seemed magnified once it was inside the water.  I liked that I got these on super clearance because the insert was from a VBS program that didn't sell well. The inserts were getting thrown out and replaced either way, so no big deal!
The party octopus (generously donated by a student who made this in art class years ago and left it behind) is holding bubbles for the kids to blow at the party or to take with them as a party favor.  I wanted to print decals for the tops of the bubbles,but with the power out the week before the party, I settled for punching circles of blue paper, gluing them to both sides of the bubble lids, and adding mermaid stickers.
Here are some of the kids enjoying the activity table.  I think one has a sea urchin, one is making an aquarium, and one is making a sand castle.  I'm pretty sure all are having a good time.
 I LOVE that the adults at the party were equally happy to play with the items on the activity table.
Finally, here is a shot of the birthday girl, enjoying another staple at my parties.  We always try to project a movie on a blank wall.  This year we scattered a few bean bag chairs in the area.  The kids pop in and pop out, so no one really cares that the volume is low.  The kids usually know the movie pretty well, this is Finding Nemo, so they don't have to concentrate on it.  For the rest of the group, this trick doubles as a decoration adding sea themed images to a big blank wall.

Want to see more about Lydia's "3 Under the Sea" party? Check out these links.

Sea Food Party Post
Planning the invitations
Thrift Store Shopping for Decorations
Sea themed frames from thrift store finds
DIY Sea themed colored chocolates

Wednesday, July 6, 2011

Counting My Blessings

I was planning to get back to sharing pictures and ideas from Lydia's birthday party, but I just don't feel like party talk right now.  A sweet friend who was a year behind me in high school posted an obituary on Facebook earlier this week.  Not looking too closely, I assumed it was a relative, maybe an older uncle or something.  At some point I noticed the dates, the loved one who passed was only 29.  Maybe a brother in law?  My heart sank as I realized what my brain did not want to grasp.  My high school friend lost her husband this weekend.  Their young son lost his father. I can't even imagine her grief.  I don't even want to acknowledge that these things can happen to people so young, to people like me. 

I'll let you know more about Lydia's party soon, but for now I will say an extra prayer for Jenny and her son, pay extra attention to motorcyclists on the road, and take an extra opportunity to sing the praises of my husband.  I didn't know Jenny's husband (we only re-connected via facebook recently) but I am certain all who knew him have a list of what made him special.  It's a shame that sometimes tragedy has to strike before we tell people how special they are.  I hope PJ and I have decades upon decades to find new reasons why we love each other.  For now, here is a special recognition of PJ Burchett, my husband, ...

... a man who.....I am convinced took his wedding vows seriously.  I was not , however, so certainthat he would honor the agreement NOT to smash the wedding cake in my face;
... a man who.... literally provides for the roof above our heads (building, maintaining, and adding on to our beautiful home) even when that means cleaning the gunky funk out of the shower drain;
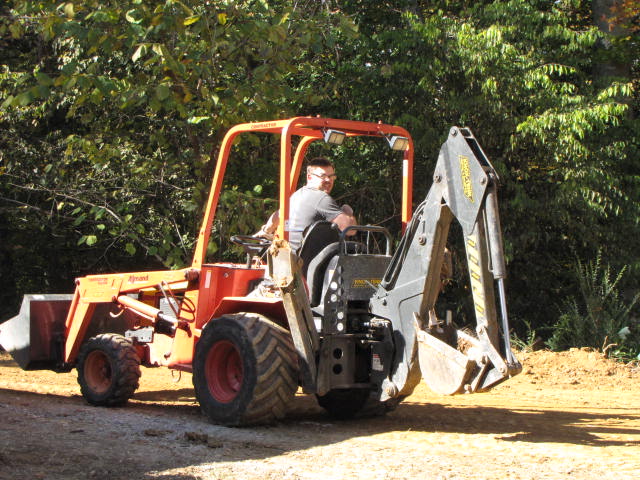
... a man who.... will literally move mountains (and top soil, and gravel, and large plants) when needed.  (The fact that heavy machinery is required is just a perk of the job!);
 ....a man who.... I have seen overcome setbacks, pull himself up, and overcome obstacles great and small.
 .... a man who.... makes life an adventure;
and most importantly..... a man who.... gave me the greatest gift and proves to be the greatest dad.

We are fortunate to have you in our lives, PJ Burchett, and we need you here for a long, long time so eat your vegetables and wear your seat belt and know that you are loved.

Monday, July 4, 2011

Mission Trip Recap and Links

As of today I have re-formatted and uploaded pictures to all the blog posts from our trip that were wird because I had to rely on my phone instead of my computer.  I am SO thankful that I even had that option and so happy to have been able to report back to our friends at home in somewhat real time about what was going on "on the rez". 

Below are the links to each day's post, to make it easier to find. 

Day 1: Travel from Knoxville to South Dakota
Day 2: Sight Seeing and Travel to Mission Site
Day 3: Work Day, expterior walls
Day 4:Work Day, interior walls
Day 5:Work Day, expterior sheeting
Day 6: Work Day and a waterfall
Day 6: Thursday Night's Storm
Day 7: Rain Day
Day 8: Heading Home

I shared a ton of pictures but I still have SO many pictures that I LOVE and so many knew friends whoms I would LOVE to have a chance to see all of the pictures, so Jen is working on movng them over to the Church's Picassa website.  The link is posted below.  You should be able to click on the link and get to ALL the pictures. I don't know about the quality if you download pictures from Picassa, say to print something.  So if you were on the trip and you find that you need a higher quality picture file, email me and I can try to get that to you.

Link to Good Sheperd's Picassa Photo Page
 
Below are a few of my favorite pictures from various days of the trip.  You will notice that they aren'tso much pictures of people working, but more pictues that reveal more about the people we worked with.


Saturday, July 2, 2011

Mission Trip Day 8: Heading Home

Our last day in South Dakota began with blessing the house that we helped to build. 

After the short service,we took up sharpie markers and signed the house.

Then we hit the road, to sight-see our way back to the airport, several hours away.  Our first stop was at The Petrified Gardens, or as I will refer to it The Worst Museum EVER! 

This place was straight out of National Lampoon's Family Vacation! We saw signs for it for miles and it came highly recommended by the grocery store clerk/ hardware store cashier/travel agent who is probably related to the owners of the Petrified Gardens.

The first display was of rocks that glow in the dark, not too exciting but not too bad.

Then you opened a door and saw a pile of petrified wood, with a label telling you it was a pile of petrified wood.  There were several piles with equally obvious signs. It was so silly, we laughed so hard! 

Back inside, there were rocks shaped like hams with labels to tell you that it looked like a ham, and driftwood that looked like an alligator with labels to tell you that too. The AC unit didn't have a sign, so I suppose it wasn't supposed to look like anything but a very sad AC unit!
This place was just kitschy, only they weren't trying to be kitschy. My favorite was the gift shop, full of creepy animals glued to pieces of petrified wood and creepier animals made out of other dead animals.


The next stop was SO AMAZING it completely made up for the Petrified Gardens. The Badlands just drops down below the prairie, kind of like the grand canyon only without the river crossed with something from a sci-fi movie. Words just can't describe it, and pictures can't capture it, but you get the idea.


Here is a group photo at the beginning of the Badlands.
A rare picture of me (note the new boots!) and below is a panarama of the badlands made using photo shop photomerge.  I had some issues uploading such a wide picture, so it has a big white border above and below.  Scroll down and you will see it. Keep scrolling for more pictures and the rest of the story.

We ate lunch at Wall Drug again and boarded a plain in Rapids City to fly to Chicago. Our plane home from Chicago had issues so we were ushered back to the terminal and eventually placed on a second plane with a second set of issues. We made it home safe, but very late at night.  Thank you to all the friends and family who have supported us in words and deeds while we had this time of service to our sister church in South Dakota! I can't wait to tell you all about it.... In person!

Friday, July 1, 2011

Mission Trip Day 7

Wow!  I can't believe it has been a whole week since we headed to South Dakota.  Today was supposed to be our last working half day, with some sight seeing scheduled for the afternoon.  However, the storms last night meant lingering rain this morning so we scratched that plan.  It worked out well, because none of the kids slept well last night so a lazy morning was much appreciated.
 When we did finally get going we drove to Holy Innocents, the church where our group worked for a week on their last trip.  The church was locked so we took a quick group photo and checked out the remains of our labor.  Most were impressed with how good the place looked compared to how they had found it two years ago.
 We planned to visit a museum, but it was closed.  So we ventured to a local art gallery and store called Soldier Woman.  I saw so many BEAUTIFUL things, but none in my price range, so I settled for taking pictures of the raku pottery and star quilts.
 Several members of our group went golfing next, while many of the kids took naps and played cards.  Jen and I headed back to Valentine Nebraska to check out Main Street.
 They have little hearts on all the street signs and painted hearts on the side walk.  I LOVE Valentine!
 This is just a random old truck/store sign, but I couldn't resist taking a picture of it.  I LOVE small town main streets!
 We returned to the kids playing cards with Domingo.  We LOVE that kid!  If you go to Good Shepherd, you will here us saying WWDD? (What Would Domingo Do?) because he was SO polite and observant and respectful and patient.  I can not say enough about him and am SO grateful we had the blessing of his fellowship.  We will miss him when we head out tomorrow, but it will also feel SO good to be heading home!