Thursday, May 19, 2011

Party in a Pinch!

A dear sweet friend of our family's dear sweet daughter is graduating from high school this week.  As a high school teacher, I have spent the last 10 or so years watching students and their families repeat this tradition.  Suddenly, I am realizing that this is the first of my friend's kids to graduate.  This is the first kid to graduate who is not my kid, but whom I have watched grow and care deeply for.  I have been caught off guard with the strength of emotion as I am remembering back to my middle school, high school and college graduations. 
I am also remembering with much gratitude the special people in my life who helped me celebrate those special moments.  My own college graduation happened only a week after a tornado devastated my childhood neighborhood and the next door neighbor who helped raise me still insisted on hosting my party even though it meant rushing her own exhausting clean up.  In appreciation for those family friends who have been more like family in my life I have decided to pay forward all that I have been given by volunteering to organize the decorating for my own friend's daughter's graduation event. 
The goal here is to lesson the burden on my friend, without any additional costs to her party budget.  I am OK with purchasing a few items, but I suspect the graduate would rather have more of my financial resources focused toward her gift instead of on streamers for a party.  So this is a penny pinching, last minute attempt to coordinate colors and maximize impact and mostly provide a pleasant backdrop for taking some candid photos of the graduate and her family on her special day.


I like to start any party with a coordinated color scheme and do that in abundance.  That way everything, from the drinks you serve to the food you provide, adds to the decoration.  You aren't spending any more on coordinating colors of  food or drinks than you would have anyways, but now you have extra decorations.


The color scheme for this particular party was inspired by ideas of bright summery colors, sweet summery fruit, and mainly the fact that I already have lots of fabric and paper lanterns in pink, orange, lime green, and yellow. 

I asked the mom if she wouldn't mind getting flowers in the color scheme (I figured she would probably get a few flowers anyway) and to pick up some oranges, lemons, and  limes (an addition to her shopping list, but all things she can eat after the party) to add to the decorations.

 
I am planning on bringing tons of coordinating colored fabric, a few paper lanterns, some curling ribbon, and a substantial amount of tissue paper in the color scheme.  I doubt I will have time to make the dot streamers (just punched out circles of paper sewn together on a sewing machine) but I LOVE the idea.  Maybe I can do it with white paper to look like bubbles for Lydia's birthday. Anyway, notice the tissue paper pom pom hanging up, I think I will try a few of those to add to the paper lanterns.


Finally, I really want to do something on the back wall behind the main food table.  I can't decide if it should be the first initial of the graduate's name, like the giant Z pictured above, or 2011 (as in class of).  Either way, it will involve tissue or crepe paper.  I think I can make little pom poms to simulate the flowers used in the big Z.  If i decide to do the fringe, there is a full tutorial on Jordan Ferney's blog.   I'll let you know how it turns out soon!

Sunday, May 15, 2011

Strawberry Picking!

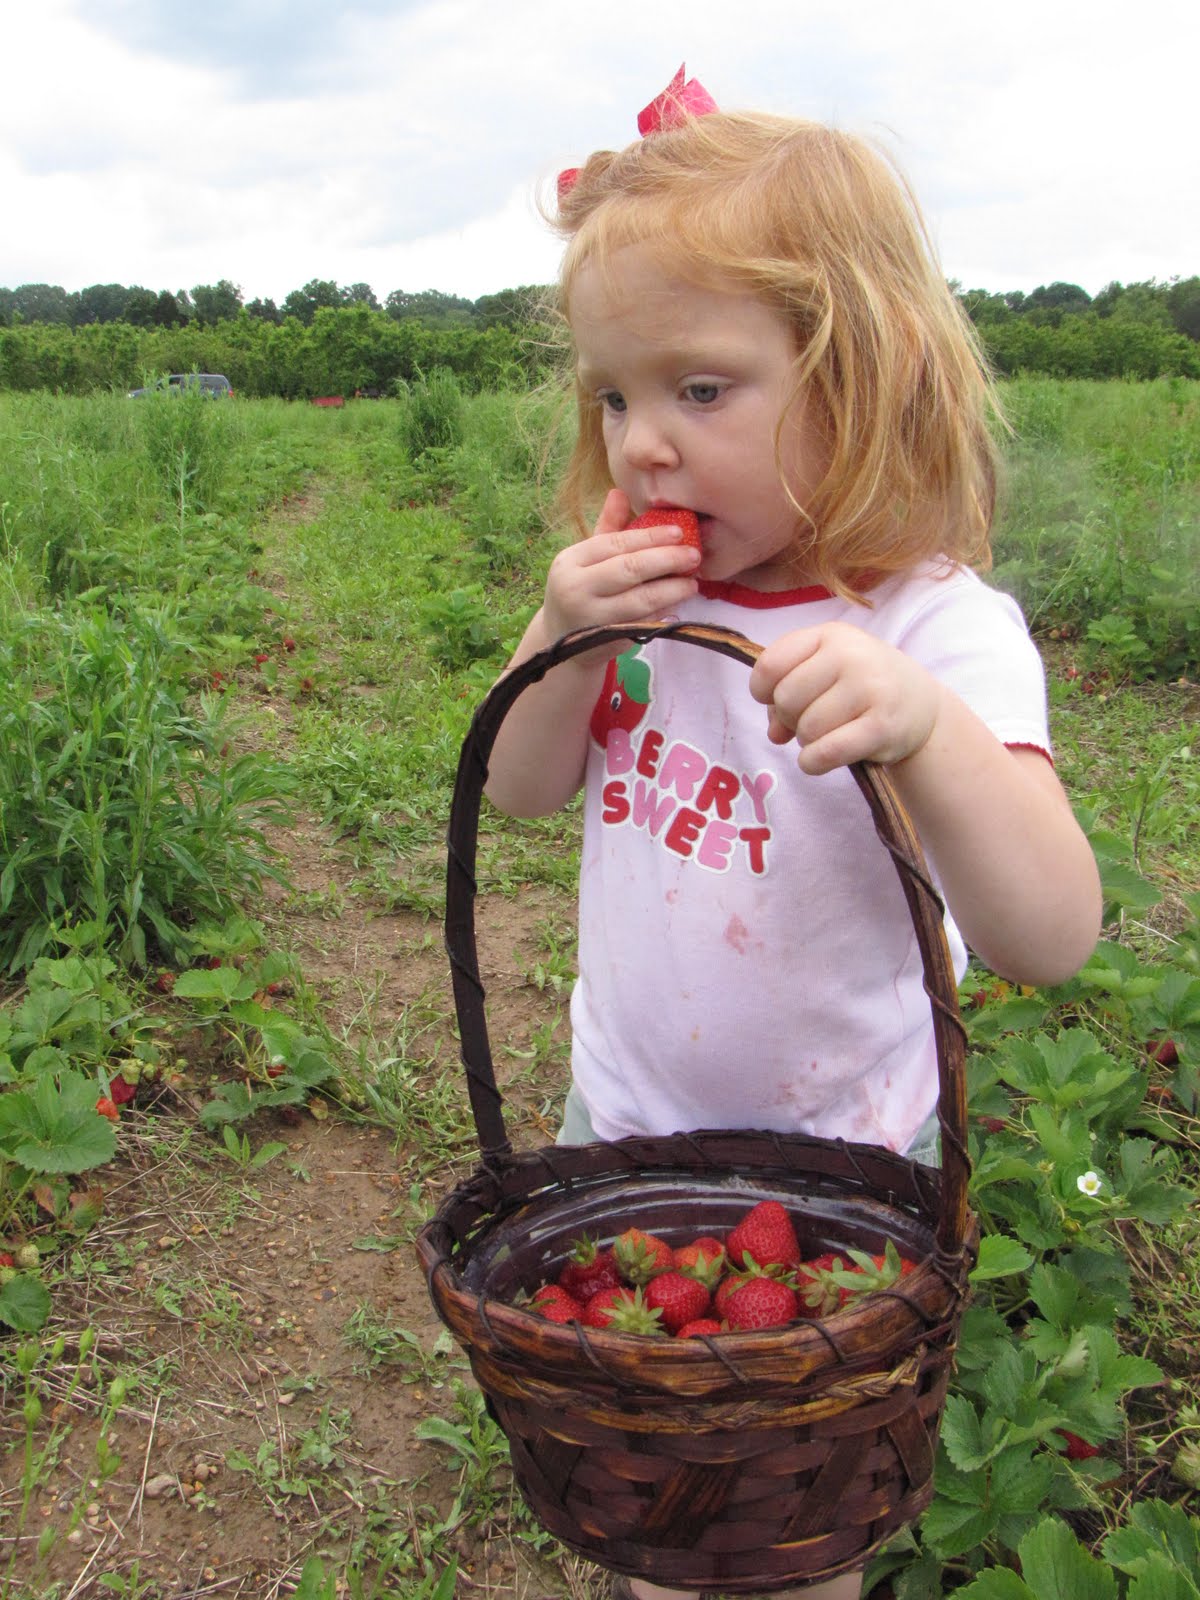
 My sister has the BEST ideas!  Lydia and I were having a little friend over for the weekend and I wanted to take the girls somewhere fun.  Enter Auntie with the suggestion to go strawberry picking.  Apparently mid may is peak strawberry season.  Who knew?!?
 We were supposed to have rain off and on most of the day, and it did pour down as soon as we got to the farm, but then it stopped and the sun came out and the farm was all ours and all the berries were washed, sort of.
We had picked up one more friend on the way and each of the girls had their Easter baskets ready to be filled.  We decided to see who could find the biggest strawberry, which made it kind of like a treasure hunt.

 At some point the girls figured out that they could actually EAT the berries.
 And eat.
 And EAT!
As Lydia's shirt says, they were Berry Sweet and BERRY juicy!
It took a while longer to fill the baskets once the girls started eating as many as they picked, but pretty soon the girls, and the baskets, were full.  We had a fun day and we will be enjoying the "fruits" of our labor for several days.

Friday, May 13, 2011

Car Show and Blogger Issues!

 We had a car show in town last weekend.  This is the same car show where PJ purchased the "Daddy Wagon" last May.  Since then, he sold his VW bug and his 2 seater truck to pay for the new/old (1968 Impala) wagon.  He painted it blue and white, worked on lots of other details inside and out,  but my favorite new details are the new surfer stickers we picked out together at this year's car show.
For the second year in a row, Lydia got to ride around the car show in her very own hot rod.  Once again, she made all the boys jealous of her ride!  This year she was looking forwad to the show and even asked me to dress her in something to match her car.  SO fun!
 Lydia sat in her car when we were parked in our spot on the fairgrounds and then rode in her car whenever we needed to go anywhere.  I packed some toys in a purse and she easily entertained herself in her car.  She fought her nap as long as she could, but by 4pm, she layed her head on the side of her car and fell asleep in it.

 I loved the idea of little Lydia in her little car wanting to race all the big guys in their big cars!  Too CUTE!
Here are a few retro images of Lydia in her hot rod.  This was last year at the same show. Boy is she getting big!
 Here are a few pictures from Lydia's first Christmas.  I actually forgot that we had the car painted in time for her Christmas photo shoot.

The paint was actually still wet when we showed up at the studio.  Also the studio was full of kids who were tired and bored.  We had to work hard to keep them from climbing on the still wet car! I think the wheels didn't even work at this point, they were just tacked on for the pictures and then it took until last spring to get it all working as a push car.

 I love that it looks like Lydia and PJ are fixing the engine in this one!
 Finally.  Have you seen this image?  I spent a bunch of time getting the new look of the blog all finished and even wrote a post all about the new look and now the post and the final details, including this new title banner have disappeared!  Blogger has been down and the latest information says that they are working to restore some posts.  Here is hoping that my post and my changes that were the subject of my post are back up soon!

Thursday, May 12, 2011

New Graphics!

Have you noticed the blog has a new look? 
 It was time for a change, but I am still learning all this technology stuff and it makes me NERVOUS!  I am always SO excited when I can figure something like this out!  Especially when I am able to tweek the technology to customize it a little.

Last year I was so happy to have discovered that one of my favorite sorces for images, Graphics Fairy, had a sister site devoted to backgrounds and banners for your blog!  Background Fairy not only creates amazing digital imagery, but it is FREE and she gives you step by step instructions for adding these images to your blog! 
I got to have some fun photoshopping to adjust the look of the background and to create a title banner.  The original background didn't have enough cherries for my taste, so I added some more (I love the clone stamp tool!)  Also, this might be because I was doing something wrong setting up the design, but that white space in the middle was just too big, so I copied some of the green polka dots into the middle area.  Sounds like a lot of work for somethig subtle, but I like having a reason to practice my photoshop skills. 

For the title banner, I have been wanting to do something with a Bee for a while now.  This blog started out as Liddy B, and was just about documenting my daughter for family and friends.  Now it has evolved to also include my own ramblings and interests, so it became Liddy B and Me a while ago, around the time I added this mamma bird to the title banner.
The new border is based on a vintage cherry label I found online.  I added a big bee and a little bee for "me and Liddy B." I included a crown (thanks again for the image Graphics Fairy!) because I wear a lot of hats (figuratively and literally) as Mrs. B., Mama B, a busy bee, sometimes just a "B (explitive)"!
 Why not just have a crown be the Queen Bee!
I need to learn to add a "button" to my blog to recognize that I am using a Background Fairy background and to show my appreciation, but i have to find the time to find the instructions on how to add a button first.  So until then, a HUGE thank you to Graphics/Background Fairy for teh inspiration, images, and information.

Tuesday, May 10, 2011

Crafty Catch Up.


I was so busy at Easter, crafting and cooking and sitting vigil at church and filling Easter eggs, that I never got around to showing off what I made. So here goes.
This was a complete last minute addition to the craft line up. I showed off the round yo-yo flower details that I added to Lydia's dress in an earlier post. I wanted something similar, but a little more grown up to complete my look. The problem was, I had NO IDEA what I was going to wear. I had several pieces that I liked, but nothing that just worked. I went shopping (thrifting) to hunt for some inspiration and found a tank top that had this large necklace piece attached to it. The best news was it was half off day at the thrift store, so I think I paid $3 for the tank and the necklace.

 It was easy to separate the necklace from the tank, just had to cut away some top stitching.  Then to make it match Lydia's flowers, I took the pinking sheers to some parts of the white fabric.  The skirt I decided to wear was a favorite from years ago, which meant that it was too small.  Fortunately, it was an "A line" shape and a little long, so I just shortened it by cutting it off at the hip area and making that width the new waist line.  Anyway, by making the waist bigger, I actually ended up with some extra fabric , so I added that to the rosettes so the necklace coordinated with my skirt. I swapped out a few of the jewels for vintage buttons and my look was complete.


 The other craft project for Easter was finishing a few more felted friends for Lydia's bunny finger puppets.  Lydia is kind of obsessed with Jake and the Never Land Pirates, so she is really excited about crocodiles (like the one who hunts Captain Hook).
 Sadly, this little lion did not get finished in time to join the others in Lydia's Easter basket.  He remains unfinished to this day.  All he needs is a mane, but I have lost my deadline, so it may take a while to get him complete!

Finally, here is my favorite Easter chick holding her felted chick....or duck....whatever.... you get the picture.

Monday, May 9, 2011

Mother's Day Card 2011

This year for my Mother's Day cards, I wanted to use Lydia's hand print again, so I thought I could make it look like a plant, with each finger being an individual blossom, instead of last year's hand "flower".
Thankfully, I had Lydia go ahead and make some green hand prints several weeks ago, on a random day when we were hanging out in the studio.  I had not realized how busy we would get with Easter one weekend, PJ's high school reunion the next, and then Mother's day the following weekend.  I used vellum for the hand print, figuring I could type and print a message on a second piece of paper, then sandwich them together.  I used grommets to hold the four corners together, since glue always looks messy through vellum.

The finished cards were to have looked like this.  They say "Happy Mother's Day!  Thanks for always lending a hand!"  Unfortunately I ran out of crafting time (or got distracted by the shiny new trapeze bar PJ gave me for Mother's Day) and the cards were just a green hand print.  Oh, well!  It could be a plant of some sort, I suppose!  It was Mother's Day, so you will have to cut me some slack!

Friday, May 6, 2011

Give someone a hand for Mother's Day!

On Mother's Day, I like to take the opportunity to celebrate, not just my mom, but several family members who help mother my child. For the past two Mother's Days I have created something out of Lydia's hand print and give it to Lydia's Grammy, Nana, Auntie, and Grandma. Sometimes I remember to make an extra one for Lydia's scrapbook. Sometimes I forget or that extra one becomes the one mistake. Ooops!

I will be finishing up this year's hand print project over the weekend, and I don't want to show pictures of it until the recipients see it first, so here is a recap of the last two projects Lydia and I made. In 2009, I traced Lydia's hand (a difficult task at the time) and used the pattern to cut out several white shapes that were turned into paper flowers. I connected a few paper leaves and wrapped the whole thing with green floral tape to make a corsage to wear on Mother's Day.

Last year, Lydia got to help make painted hand prints. Once she was cleaned up, I put some glue on the back of a butterfly shape and let her stick it to the card. I finished it off with some Easter grass and hand lettered a message of thanks.

This year we are doing another painted hand, but with a different look. I'll show you real soon!